Sunday, March 11, 2012

Rice Krispies + Peeps + Chocolate = YUM!


Wouldn't you know it?  The baking bug hit me today, and I didn't have enough ingredients on hand to make cupcakes.  I sent my hubby to the store to get some things.  I didn't want the creative juices to go away, so I thought I would share with you another recipe using Peeps.

This is a fun, and very messy, recipe to do with your little ones.  Be prepared for the mess.

Okay....let's begin.

The ingredients are pretty easy.  You will need two boxes of Rice Krispie treats, eight (8) bunny Peeps (or 16 chick Peeps), melting chocolate, and sprinkles.


Remove the treats from the packaging, and place them on a plate.  Using your hands, flatten each treat so they are about one inch high (to be honest with you, I'm not sure why I flattened them in the first place.  Once I did, I realized they were a lot easier to work with).

Now it's time to commit murder.  If you are using the bunny Peeps, you will have to slice each one down the middle so you end up with two bunnies.  Hey....they are known to multiple quickly, you know).


Please forgive me, Easter Gods

Melt the chocolate according to the directions on the package.  Now comes the assembly.  You can either dip the top of the krispie treat in the chocolate so that it is covered, or you can spoon and then smear the chocolate on the treat.  I found that the spoon way was easier (and cleaner).


Take one of the bunny halves, and place on top of the chocolate.  Put the treat on top of wax paper, and top with sprinkles (Sprinkles are really optional.  I love them, and will put them on anything possible).  The chocolate sets pretty quickly, so you can enjoy these in matter of minutes.


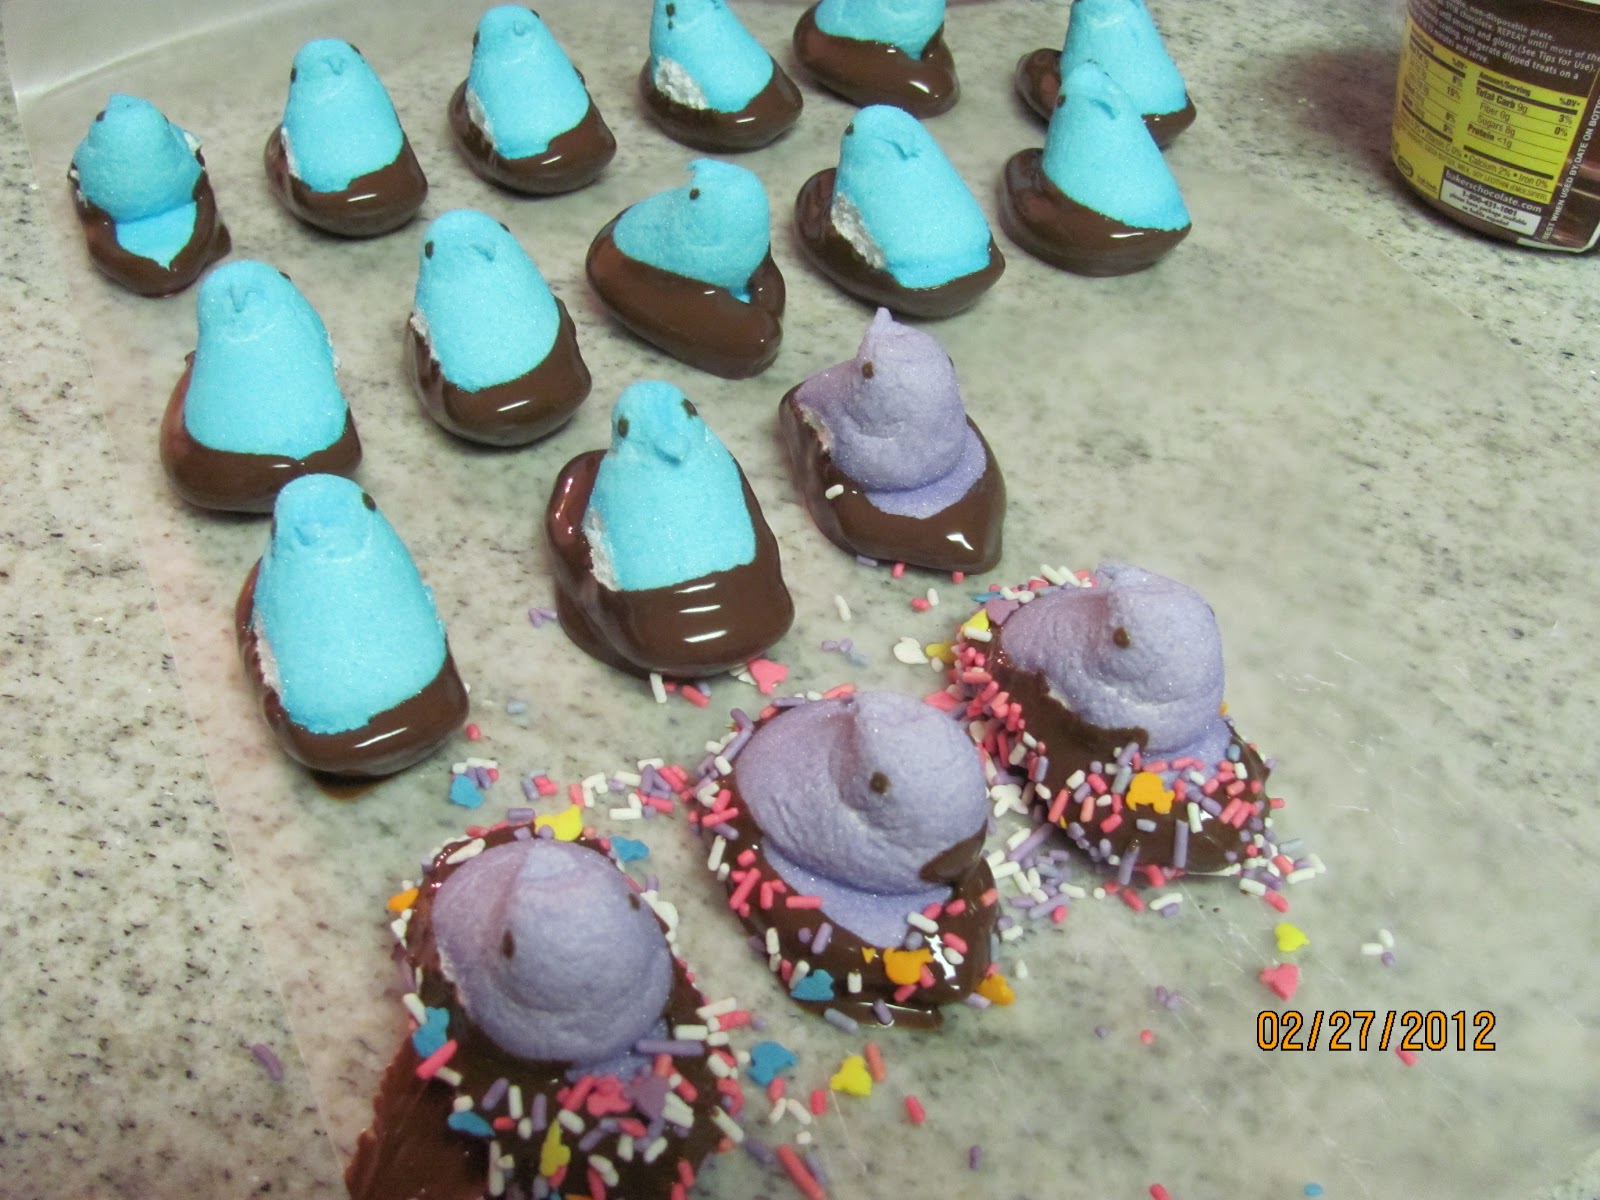
A chick sitting on his nest

A whole tray of these would look cute on any table, and would also make a festive party treat, especially for school classroom parties.  I used the products that I had on hand, but you could use different color chocolate and marshmallows.

The best thing about this recipe is you can adapt it for each holiday.  Peeps are available all year long, so you can make these at Halloween using pumpkin peeps and at Christmas using tree peeps. 

Try these with you little Peep fans, and let me know how they turned out.


A peep wearing her Easter bonnet (Meg's creation)


Tuesday, February 28, 2012

One Dirty Chick

Get your mind out of the gutter.

Here is the dirty chick I am talking about.


Dirty chick....get it?  I love Peeps, and I especially love them dipped in chocolate.  Sure, you can buy chocolate covered Peeps in the store, but I don't like those ones.  You know why?  The sugar coating is missing!  You are basically eating a chocolate covered marshmallow.  Peeps are not simply marshmallows!  The sugar coating is what makes it a Peep.

These would make cute party favors, especially for classroom parties (guess what the 2nd grade is going to have in April?).

Dirty Chicks are super easy to make.  All you need are Peeps, melting chocolate, and wax paper. 


We used blue chicks because, well, it reminded me of a blue duck, and I've never seen a blue duck before (Did anyone get that movie reference?).  Be sure to follow the directions when you melt the chocolate.  If you overheat it, it will not melt properly and you won't be able to use it.   Take a Peep, and dip the bottom of it in the chocolate.  Gently shake the chick to remove the excess chocolate, and then place the Peep on wax paper.  That's it!  That's all you have to do.  Keep dipping the Peeps until you run out of either supply.  Once you are done, you should have your own little chicken coop.


Not only do I love chocolate covered Peeps...I also love sprinkles (because I have the taste pallet of a child).  I thought the sprinkles added a little more color to this sugar treat.


What do you think?

Monday, February 27, 2012

My Own Lil Bit 'O Trouble

This past Saturday, my daughter and her Girl Scout troop sold cookies at the local mall.  Their booth was located in the food court, which was a primo spot.  It was also located across from the Nestle Toll House cookie stand.  Competing with them shouldn't be a problem -- who wouldn't want to buy cookies from sweet little girls?  I'll tell you who.  My daughter.

Her: "Can I get a cookie?"
Me: "What?  Are you kidding me?  You are selling cookies."
Her: "Come on!  They have the good cookies I like."

She's a great salesman, right?

And the cookies she likes?  It's call the Lil Bit 'O Trouble.  It's a small frosting sandwich -- two chocolate chip cookies with vanilla frosting in the middle, and rainbow sprinkles on the outside.  They also cost just about $3 a pop.  You would think that I have had enough of cookies already, considering I am the Girl Scout cookie mom.  You think wrong.  I decided to make my own version of this cookie, for much less than $3 a cookie.  I must admit to you now that I took the easy way and cheated.

You will need the following supplies: one can of vanilla frosting, a package of ready-to-bake cookies, and sprinkles.

I used the seasonal sugar cookies I found at the grocery store. I also made two packages, for a total of 48 cookies, which would make 24 cookie sandwiches.

Bake the cookies as directed and allow to cool completely.


I love these cookies.  My mom used to call them Magic Cookies because of the designs.  I was excited to find the Disney designs -- we are huge Disney buffs.


Place a glob (that's the technical term) of frosting on the bottom of the cookie, and place another cookie on top.  You should now have a cookie sandwich in your hand, and some of the frosting should be oozing out of the sandwich. 


Take your cookie sandwich and roll the outside of it in the sprinkles.


You now have your own version of the Lil Bit of Trouble.  Pretty crazy that someone charges $3 for these things, right?  I made 24 for less than $5.  The kids at the school's morning YMCA program were very happy to see me with these this morning.


And for those of you wondering....No.  I did not buy her a Nestle cookie when we are at the mall.  She got ice cream.

Come back tomorrow to learn how to make Dirty Chicks (not gonna give any secrets).

Thursday, February 23, 2012

Tasty Thursday

Buffalo Chicken Dip....everyone has their own version of the recipe.  I got this recipe from my husband's cousin's wife (did you follow that?) years ago.  She brought this dip to a party, and everyone went crazy for it.  It was so good -- it was like nothing I had before -- and I had to find out how to make it.

I made it, and brought it to a party, and everyone went crazy for it.  People asked me for the recipe, and I'm sure that they now make it, bring it to parties, and people go crazy for their version.

Below is how I make this dip.  My cousin MD (the 2nd one) makes it a different way, and we went head to head one day.  It was like the Pepsi challenge.  Which one did you like better?  I'll admit it...she beat me. 

Buffalo Chicken Dip

1 lb. cooked chicken breast, shredded
1 block cream cheese, softened
1 jar blue cheese dressing (not the kind that can be found on the shelves -- you have to get the kind in the produce section)
2 cups buffalo wing sauce
2 cups shredded cheddar cheese

Preheat your oven to 350 degrees.  Heat the chicken and wing sauce in a sauce pan over medium heat, until heated through.  Add the cream cheese and dressing.  Cook, and stir until well blended.  Pour into a 9x13 casserole pan.  Spread the shredded cheese over the mixture.  Cook for 35 minutes.  Serve with crackers and celery sticks.

Like I said, I lost to her in the challenge.  I'm up for another one.  I think I can take her.  It would be like our version of the Iron Chef.  What do you say?