Showing posts with label Pinterest. Show all posts

Friday, May 17, 2013

And The Award Goes To....

Girl Scouts can earn a variety of badges throughout the year.  Let me say that another way.  The girls can earn A LOT of badges.  Seriously, there is a badge for everything.  Picked up trash at the park?  There’s a badge for that?  Helped at a bake sale?  There’s a badge for that.  Went Christmas caroling at the retirement home?  There’s a badge for that.  These types of badges are called “Fun Badges”, and they are placed on the back of a girls vest.  Some troops opt to not earn these types of badges because of the expense. 
Not 
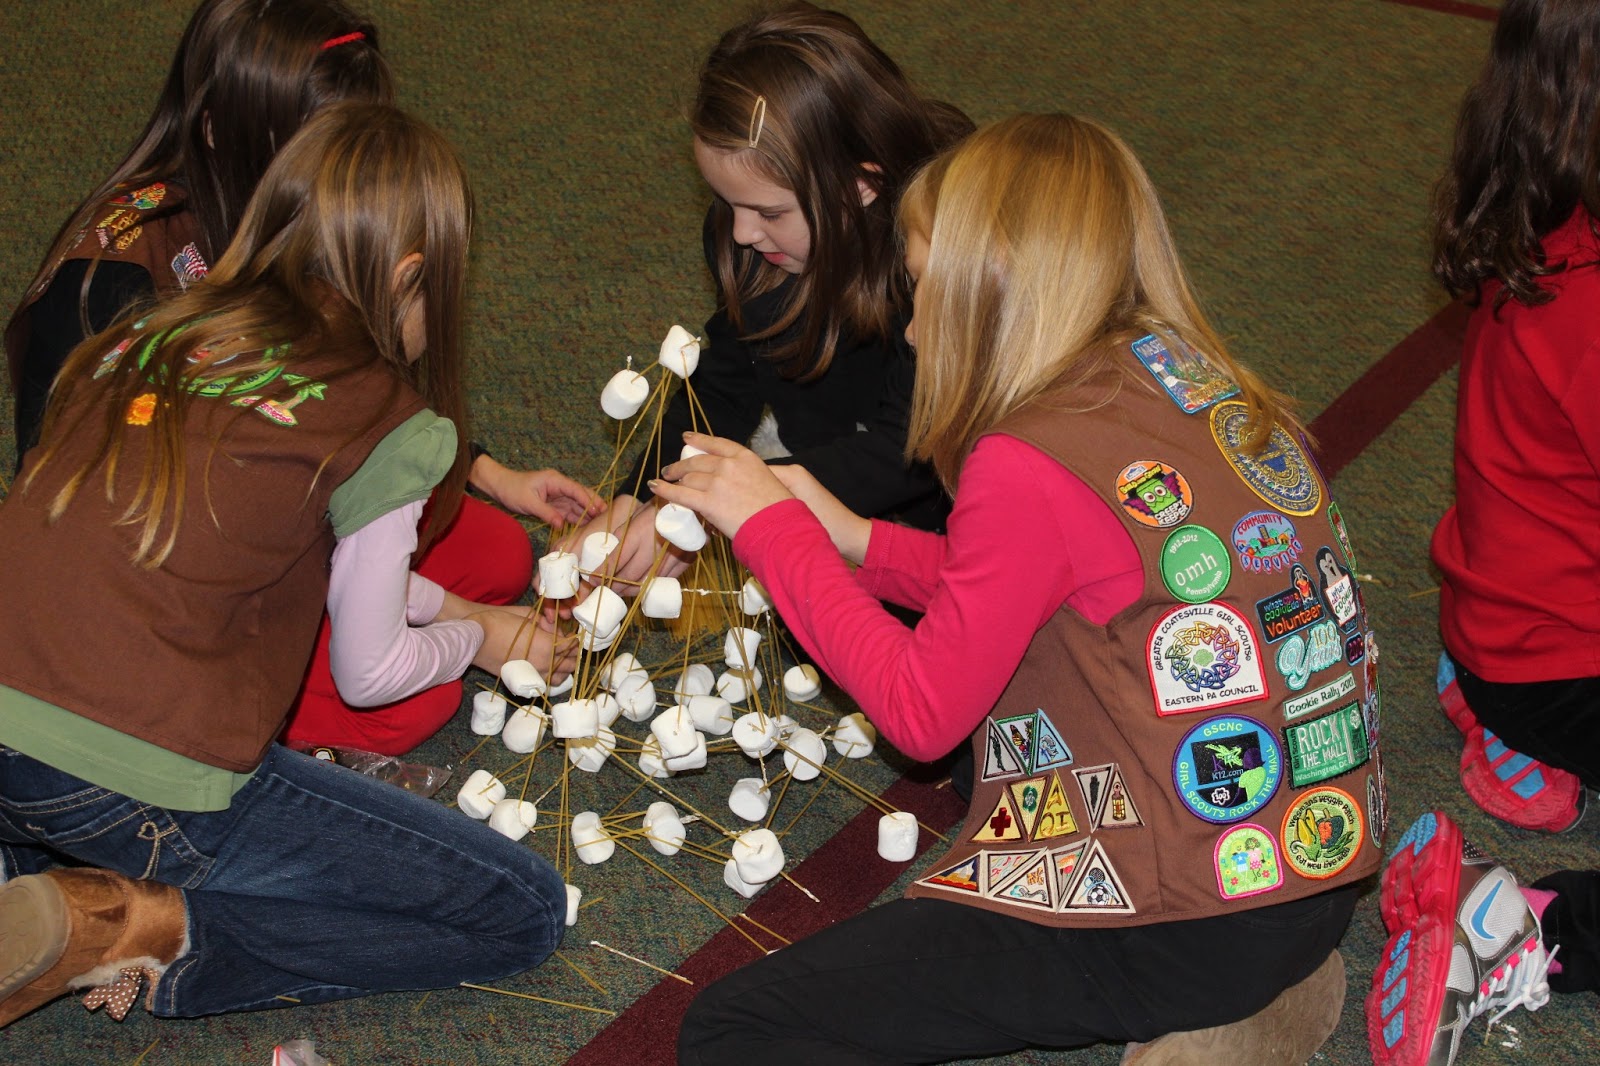
our troop!  The girls love getting these types of badges.  They proudly wear them on their vests, and some have earned so many that they ran out of room and put them on their bags.  These badges act as a walking history of the troop.


I had a good amount to hand out at our last meeting, and wanted to do something a little more than just throwing them in a sandwich bag and handing them over.  Search Pinterest (where else!), and you will find a ton of ways to distribute badges.  Some troops go above and beyond what I can even imagine!  I had seen these ribbon awards on several boards, and thought they were cute.  Here’s how I did it:

Gather up the following:
  • Cupcake liner (I found that the aluminum foil ones are best)
  • 1” wide grosgrain ribbon
  • Glue
  • Cardstock
  • Safety Pin
Flatten the cupcake liner with your hand so it will fan out into a circle.  You can stop there, or you can put the liners between the pages of a thick book, which is what I did.  This will really help you to flatten them.

Using the scientific “Eyeball Method”, determine the length of ribbon needed.  This is based on the amount of badges per girl.  Some girls will have longer ribbons than others.  Each award requires two strips of ribbon.

Put a little bit of hot glue on the back of the badge, and place on the ribbon.  Don’t worry about the badges getting stuck to the ribbon.  You are using such a small amount that it will be easy to pull them off.

Glue the ribbon to the back of the cupcake liner.

Add a little something to the middle of the cupcake liner – the sky is the limit.  You can cut a piece of card stock into a circle, write the scout’s name on it, and then glue to the middle of the liner.  I had these cute little circles in my craft stock, and they worked perfectly.

I put a safety pin on each award, which allowed me to pin the awards to the girls at the meeting. 


This is a great idea for the following reasons:
  1. The girls immediately pinned the awards to their shirts at the meeting.  I think they were into it, which is always a good thing.
  2. Having the award ribbons pinned to the girls ensured that the badges made their way home.  I always fear that badges get lost.
  3. The craft itself cost me $0 to make, as I had all of the supplies on hand. 


Until next time…..

Thursday, May 16, 2013

Time To Girly It Up

I pulled out the old sewing machine this weekend because I came across this idea on Pinterest, and fell in love with it. 

This is the Monkey’s R2D2 shirt.  She has had it for several years, but stopped wearing it because it’s not a “shirt for girls’.  Her words, not mine.  I can’t argue with her, because I did buy it in the boys section of Target.  I can never find cute Star War shirts for her (or for me!).  This is how I am going to “girly” things up until someone taps into that market.


Snip off the arms, snip off the neck, make a simply straight stitch on the front and back, weave a strip of leftover t-shirt (or ribbon) through, and tie it up.  Done!  Easy, right?  Check out the instructions over at Crafter Hours for full details.


Until next time.....

Monday, May 13, 2013

Beach (towel) Bunny

The Monkey went to a birthday party over the weekend to the Philadelphia Zoo.  How cool is that party?  We talked about what kind of gift she wanted to give her friend, and her first thought was a toy.  I don’t know about you, but our basement is full of toys – I don’t want to add any more clutter to someone else’s house. 

We already did the candy bouquet, so we went with the Bunny basket .  I found this picture on Pinterest , but it didn’t provide any instructions, so I just figured out what to do by looking at the picture.  I got all of the supplies at Target – one large beach towel, a pair of flip flops, a beach ball, a bubble wand, and a swimming goggles.


Here’s how I constructed the bunny:

Lay the beach towel out, and fold down the top half.  I placed the beach ball in the center of the towel.  Roll the towel as if you were rolling a piece of sushi (‘cause you do that often, right?).

Secure the bunny body with goggles (the goggles act like a rubber band).

Angle the flip flops at the top of the bunny’s heads so they resemble ears, and place them in the folds of the towel.

You can’t see from the picture, put I placed the large bubble wand between the ears.  I hoped to put a bow on it to make it a girl bunny, but I didn’t have enough ribbon on hand.  We put the card behind the ears to hid the wand.

I topped it off with a hair clippie I made.

There you have it.  A non-toy birthday gift!

Until next time.....

Wednesday, May 8, 2013

Thank You "Berry" Much

It's teacher appreciation week, and just like the rest of the free world, I headed to Pinterest for ideas.  I love the Monkey's teacher. She has been such a positive influence for her.  In fact, if it were not for this teacher "fighting" for her, the Monkey would not have been accepted in to the school's gifted program.

The Monkey wants to give her teacher a gift each day this week, and here is what we did on Monday.  The idea came from, where else, PINTEREST!  I had the strawberry scented soap and strawberry sanitizer on hand, as well as the wrapping supplies.  I wrapped them in tissue paper, placed them in a gift bag, and tied it up with a ribbon.  I simply wrote "Thank You Berry Much" on a piece of construction paper, and tied it with the ribbon. 

Not going to lie -- I had this stuff on hand from a recent great sale at Bath and Body Works!


It doesn't matter if you give a teacher a gift, just make sure you tell them THANK YOU!

Until next time....


Tuesday, May 7, 2013

Treats For Your Feet(s)

Is it just me, or is planning a birthday party stressful?  It doesn't matter where you have it at -- the stress is still there.  Just trying to come up with the idea or "theme" of the party throws me over the edge.  The Monkey has celebrated her birthday in the past at the local rock climbing gym, the bowling alley, the movie theater, the farm, and at our house.  Let me state right now...never again will it be at our house, at least not until she is older.  Cleaning the house, preparing the food, asking kids not to jump on your couch, cleaning up the spills....ugh.  I am all too happy to show up somewhere, and allow them to take care of that stuff.  It's such a good feeling just to hand over some money, and walk away from the mess.

This past weekend, the Monkey celebrated her birthday a week early at Toot Sweet, a local bakery, and it was great.  She invited nine of her friends to come and decorate cupcakes.  The bakery prepared the cake according to her directions.  She wanted each guest to have two vanilla and two chocolate cupcakes.  She picked up the color frosting they would use, and we chose to upgrade the party to include fondant.  The package also included a 1/4 sheet cake, which she designed.  She may be watching too many reality cooking shows, because she drew her design on a piece of paper.  We met with the baker, and they worked out the details.  The baker said she has never had a kid do that before!


Tables were lined up, and each guest were given a their own apron and hat.  Then the fun began, for the girls and for me.  I didn't have to do anything!  In fact, I sat outside and enjoyed the beautiful weather with my husband and my sister-in-law.  The bakery handles everything -- she explained what the girls were going to do, gave them directions and decorating ideas, and away they went.  They worked silently, and concentrated hard on their designs.  Once all the cakes were decorated, they were professionally boxed up and the girls got to take them home.

To put our own spin on the cupcake theme, I made sock cupcakes as party favors.  Search this idea on Pinterest, and you'll find a TON of ideas.  That's what I did.  Most tutorials will tell you to use the nice, comfy slipper socks.  I think these type of socks would be appreciated by an older girl, and not by the group of 9 year olds that attended the party.  These were pretty easy to assemble.  Here's what you need to do:

  • Pair of socks (I found a 3 pack for $1 at the....dollar store)
  • Tube of lip balm (I was able to find Blow Pop and Nerd flavored balm at the dollar store)
  • Rubber band, or hair band
  • Cupcake liner
  • Tissue paper
  • Ribbon


Lay the socks out, and then fold in half.  Place the lip balm at the "toe" end of the socks, and start to roll the sock from end to end.  You want the cap portion of the lip balm to show at the top of the socks, because this will act as the "cherry" on top.  Use the rubber band or hair band to secure the socks, and place in a cupcake liner.  I think that if you use the slipper socks, you won't have the gap that I had between the liners and the socks.  To help hide that gap, I used tissue paper.  I placed a small amount of paper around the "cupcake", and tied it with the ribbon.  Then I placed it in the liner.  Presto!  All done.

We also gave out some homemade hair bows, that had cupcakes on them.  I've been in a bow making mood recently, and the Monkey has been watching.  These bows were all her idea, and in fact, she made them (with a little help from me).  The cupcakes are actually buttons we found in the sewing section of the craft store.

One part of the birthday celebration now...another to go.  Her birthday is next week, so now we need to plan on her treats for her classmates.  Her request?  It has to be something we haven't done before.  Time to put on my thinking cap!

Until next time....


Tuesday, April 30, 2013

My Adventures in Freezer Cooking


Oh, little blog…do not think that I forgot about you.  Life has just gotten in the way.

Freezer cooking.  Ever heard of it?  It’s all the rage on Pinterest right now.  Find a bunch of recipes, make a list of what you need, hit the grocery store, put all the ingredients into a freezer bag, and stuff your freezer.   There are site dedicated to this concept, which is great for someone like me – the person that doesn’t want to do the work.

There are actually businesses that will do the work for you.  They also fool you into doing the work by calling it a Girls Night Out.  You and a bunch of your peeps spend the night putting together these meals (the business does all the shopping, cleaning, and cutting) while enjoying a few glasses of wine.  These Girls Night Out do not come cheaply!

I am not ready to dedicate an entire day in my kitchen, especially since the weather is getting nicer.  I am ready to try one or two of these types of meals, which is what we did last night.  I made Slower Cooker Black Bean and Corn Salsa Chicken, which I found at Six Sisters Stuff.  If you haven't been to their site, do yourself a favor and check it out.  It's great.

Slower Cooker Black Bean and Corn Salsa Chicken

Ingredients:
2 cans black beans, drained and rinsed
2 cans corn, drained
1 pkg. taco seasoning
1 cup salsa (mild, medium, hot – your choice)
¾ cup water
1 lb. boneless chicken breast

Place all the stuff in a freezer bag, and stick in your freezer.   Allow the contents to thaw in your refrigerator the day before you want to serve it.  Place in your crock pot, and cook on low for 7-8 hours.  Shred the chicken before serving.

Food doesn't have to look pretty.  It just needs to taste GOOD!


I made nachos – simply place a few scoops on top of some tortilla chips, and top with sour cream and shredded  cheese.  My husband made burritos using this chicken mixture.  I will tell you that he said it reminded him of vegetable soup.  Not sure what to make of that.  He did say it was good, so I do know what to make of that!  

I pulled a bag out of our freezer last night..I'll tell you all about it later this week!

Until next time.....

Wednesday, March 27, 2013

Birthday Candy Bouquet

It's birthday party season.  If you are a parent of an elementary school aged child, you know what I am talking about.  For those that don't, allow me to explain.  The Monkey is in a class that has just over 20 students in it, and she averages a party invite about every two weeks.  More often than not she ends up missing them, due to previous commitments.

But not today!  Today she went to a laser tag party (she's there as we speak) that included a chocolate chip cookie cake.  I'm not sure what she was more excited about -- the cake or the party itself.

I wanted to do something a little bit special for this friend, because she is a "good kid".  You know, she's the kid you want your child to stay friends with for as long as possible.  She's friendly, polite, kind, considerate....just a good egg.  I saw posts all over Pinterest for a candy bouquet, so I decided to make one for her.  Here's how you can do it.

Supplies
(I purchased all of these at the Dollar Tree, so this is not something that will break the bank)
4 boxes of movie theater candy, roughly all the same size
One block styrofoam
Package of crazy straws
6 regular size candy bars
Packing tape, glue, and a piece of cardboard


Line the boxes of candy up so that they form a square (sorry, for some reason I neglected to take a picture of this step).  Use the packing tape to tape the boxes together FROM THE INSIDE.  This way, the recipient will not see the tape.

Cut a piece of cardboard to fit the bottom of your "box".  I used an empty cereal box.  Line the candy boxes with glue, and attach the board.  You will need to allow the glue to set, so walk away and do something. 


Once the glue is set, turn your masterpiece upside down so the board is now on your workspace.  Place the styrofoam inside your candy vase.  You most likely will need to cut it to fit the space. 


Attach the candy bars to the crazy straws with a piece of packing tape.  If you don't have the straws, you can use a wood dowel or a ka-bob stick.  I thought the straws were a fun addition to the craft, and it was something that could be used again.


Once you have the candy bars taped to the straws, you can place the straws in to the styrofoam.  You want to place them as far down into the foam as you can, so they can be stable.  You don't want things to fall apart when you are giving the gift.


The styrofoam looks pretty ugly, so you want to fill up all of the empty spaces.  You can use more candy if you, like Hershey Kisses.  Or you can fill it up with strips of crinkled paper, or even Easter grass.  I had some tulle left over from when I made my niece a tutu, so that is what I used. 


Voila!  You are done.  You have now created your own candy bouquet.  My aunt told me that she found a store selling candy bouquets for $30, which is CRAAAZY to me. This cost me $11 to make, and I'm sure it could even be made for less money if I shopped around.

The birthday girl loved her gift.  The first words out of her mouth were....well, they were "Thank You".  Remember, I just gushed about how polite she is.  The second words out of her mouth were "AWESOME!".


Until next time.....

Thursday, March 14, 2013

Operation Baking Gals (Again!)

Last month I wrote about Operation Baking Gals, which is a great program I take part in.  It’s a group of volunteer bakers from around the country who bake and ship homemade treats to military men and woman that are currently deployed in war zones.  I signed up to participate this month, and shipped out the package yesterday.

I fully intended to have the Girl Scout troop help with this package, but time wasn’t on my side.  Sometimes ideas sound great in my head, but when I try to execute them, they go C-R-A-A-A-Z-Y. 

This month I made a batch of Puppy Chow.  No, I did not send dog food.  For those not familiar with it, Puppy Chow is a sweet version of Chex Mix.  It’s super easy to make, but be warned!!!!  It is very addicting.  There are various recipes (check them all out on Pinterest).  I found this one for a Thin Mint version, and that seemed appropriate.  I used the recipe as a guide, and adapted it to use ingredients I could find.

I also included boxes of Girl Scout cookies, plus drink mix packs, peanuts, and gum.  I figured the package would arrive just before Easter, so I included plastic eggs that I filled with candy.   I thought they looked cute, and hopefully it will bring a smile to the face of the recipient.

Some BUNNY is thinking of you

Thin Mint Puppy Chow

Ingredients:
10 cups Rice Cereal (such as Chex)
2 cups powdered sugar
1 tsp mint extract
Pkg Wilton Candy Melts (or any melting chocolate)

Instructions:
In microwave, melt the chocolate for one minute.  Stir, and continue melting every 30 seconds until smooth.
In a large bowl, combine the cereal with the melted chocolate.  Add the mint extract.  Fold mixture together until all the cereal is coated.
Add the powdered sugar to a large Ziploc bag.  Spoon in the cereal mixture.  Seal the bag and shake until the sugar is coating the cereal completely.
Pour cereal onto a large piece of wax paper and allow to cool.
Store in an airtight container.

Yum!

Not only is it rewarding to participate in Operation Baking Gals, it's easy too.   The boxes are free from the post office, and you can probably whip up something using ingredients you have in your pantry.  If you are interested in taking part, let me know.  I am thinking of becoming a team leader, and could use a little support.

Until next time....


Tuesday, March 5, 2013

How Do You Like Your Eggs?


OMG!  OMG!  OMG! 

This statement is overused, but I gotta say it: This is one of the coolest things I ever saw.   Seriously, it was.  How many people can say they held the inside of an egg without having the yolk all over their hands?  Well, the Monkey and I can say that now.  We did the Naked Egg experiment that you have probably seen all over Pinterest (cause that’s where I saw it).

Supplies: Egg, vinegar, corn syrup, glass

We aren't wine drinkers, so I figured now was as good a time as any to use the glass.
Place the egg in the glass, and pour in the vinegar until the egg is fully covered.  Here’s the part that was the hardest for the Monkey: WAIT.  Leave the egg alone.  Don’t touch it.  Just observe it.  You’ll notice the egg will float up-and-down, and that bubbles will appear.   That’s normal.   After a day in the vinegar bath, you’ll notice a scummy layer at the top of the surface of the liquid.  That’s part of the shell.  Carefully remove the egg from the vinegar, and gently rub the shell off.   At this point, you should have the naked egg in your hand.  Cool, right?

No clue why she felt the need to decorate her forehead.

Holding the naked egg

So, what do you do with the naked egg?  Well, besides poke at it which is what the Monkey did, you can make it grow big, or you can shrink it.  We did both.

To make the egg grow, you simply put it in a cup of water.   I’m no Bill Nye the Science Guy, so I can’t even begin to explain why it grows.  I just know that it does.  If you want to learn why (it’s called osmosis), check out the explanation on Imagination Station.

To make the egg shrink, you simply put it in a cup of corn syrup and let it soak for a day.  Again, I’m no Bill Nye, so you need to learn the science behind this coolness at Imagination Station.  If you leave the egg in the syrup for a while, it will look like big raisin.

The egg raisin

Proving she held the egg
We decided it was time to throw the egg out, but before we did, the Monkey tried to break the egg.  She held it in the air, about 12 inches away from the plate, and dropped it.  Nothing happened. She did this several times, and it never broke.  Then she poked it with her fingers, and noticed that the yolk was hard as a rock.  It was at this point she got a big freaked out, and tossed it in the trash.

This is a really cool thing that you should try with your kids (small and big).  Chances are you have an egg and vinegar on hand, and if not, you will when it comes time to dye Easter eggs.  I hope you enjoy it as much as we did.

Until next time.....

Friday, March 1, 2013

Unless....

Happy Birthday Dr. Seuss!

The Monkey's school didn't have an official birthday party for him, but they did declare today "Crazy Hat and Sock Day".  I wish I took a picture of her this morning, but time slipped away.  Just know that she wore slipper socks and a big red yarn hat.

We didn't think socks and hats were enough to celebrate one of our favorite authors, so we decided to make cupcakes.  And not any old plain cupcakes.  We wanted to make Truffula Tree cupcakes.  If you aren't aware, Truffula trees are from the Lorax.  The Once-ler cuts down the trees to gather material to make his "Thneeds", which is something "everyone needs". 

You can find these cupcakes all over Pinterest, but I got the idea from Tablespoon.Com.  They do a great job decorating their cakes.  We did it the quick and easy way.  I think you can get the point from the picture: bake 24 cupcakes, add green coloring to vanilla frosting, add cotton candy to the top of a pretzel stick, and put the stick in the cupcake.  One word of advice: Add the cotton candy on the day you plan to serve the cakes.  Cotton candy will lose its "fluffiness" when left out overnight.


We took it one step further, and made Lorax cookies...courtesy of Pinterest!  All you need are Nutter Butters and frosting.  Truth be told, I think most of these look like ducks!


Remember...Unless someone like you care a whole awful lot.  nothing is going to get better.  It's not.

Until next time....

Tuesday, February 26, 2013

Mean People Suck!


Just as I was settling in, getting ready to watch the Oscars, I discovered that the plans for the next night’s Girl Scout meeting fell through.  Crap!  I thought I was in the clear, and didn’t have to do anything, but I was wrong.  I found myself scrambling to come up with something for ten girls to do – and it had to be something that required minimal preparation.

I’m not sure why, but I started to look up ideas about No Bullying.  I guess I think the girls are at the age when they start to find out that MEAN PEOPLE SUCK.   I wanted to help get the message across without being to preachy, and without the girls feeling like they were back in their classrooms.

After some searching on the Internet, I came up with these ideas.


Crossing the Line     

This is a simple game to get the girls to think about how others often “cross the line” with their words.  I took a jump rope, and laid it on the ground in a straight line.  I asked the girls to line up, shoulder to shoulder, on one side of the rope.  Before we started, I asked the girls if they knew what it meant when someone crosses the line.  One girl said her mom says it to her all the time!  I explained that crossing the line means someone says or does something in a way that makes another person feel badly.  I read some ways that people in the troop or in their class might behave.  If the girls though it was “bad” they took a step over the rope (thus, they crossed the line). 

Here are some of the things I read to the girls:

“Would you like to eat lunch with me?”
“Did you really wear that ugly shirt to school?”
“Only my friends can play this game at recess.”
“Sorry, my mom said I can only have 5 people at my party.  But, I will invite you over to play another time.”

This game allowed the girls to think for themselves, because while some thought the behavior was bad, some did not agree.  It was a good activity to get the girls talking.


Wrinkled Heart

You probably saw this activity all over Pinterest (because I did!).  I gave each girl a paper heart, and every time I said something not nice, they had to fold the paper.  Eventually, the paper heart took the shape of a paper ball.   I explained to the girls that every time you say something hurtful to others, you are putting a wrinkle on their heart.   I then complimented each girl, and with each compliment, the girls could unfold their paper.  I explained to the girls that even though the words were taken away, the wrinkles remain and that we should be careful with what we say.   We then took this poem (Before you speak, Think and be smart.  It's hard to fix a wrinkled heart), and attached it to our hearts with a band-aid.  

SpongeBob can definitely help to heal a hurt heart.

  Compliment Catcher

I don’t think we compliment one another as much as we should.  Too much time is spent on the negative, and not on the positive.  I think this is the truth for Brownie Scouts as much as it is true for those in the workplace.   It seems to be easier for people to put things in writing rather than actually saying it, so that’s what I asked the girls to do. 

Each girl was given a sheet of adhesive labels and a pen.  I asked them to write down as many nice words as they could think of on each label.  At first it was met with some whining, but once they got into the swing of things, each was able to fill in the entire sheet.  Each girl was then given a paper plate shield to wear (I prepared these before the meeting.  I punched two holes at the top of the plate, and tied string around it to make a necklace.  The plates were labeled with their names).  The girls were told to wear their plates on their back.  Then I released the hounds: the girls had to walk around the room, and had to place a compliment sticker on another girl’s plate.  At times they looked like a dog that was chasing its tail!  They were walking in circles after one another, giggling the entire time.  After the last sticker was placed, they took a look at their plates and discovered each one was filled with kind words.  I told them that whenever they have a bad day, and someone said something hurtful, they could go home and look at their plate to remember the nice things their sister scouts said.


This was my Monkey's plate.


So, here is what I have left to say about this lesson: Pay it forward tomorrow…do something nice for someone….say something kind to another person....SMILE.

Until next time.

Tuesday, February 19, 2013

Sticky Fingers


What happens when you give a group of girls a bag of marshmallows and a box of spaghetti?  Well, besides a lot of giggles and sticky fingers, you get some creative towers.

We did this activity a few weeks ago (I just neglected to share it with you!).  Believe it or not, I did not find this off of Pinterest (SHOCKING, right?).  This was something we did at my place of work years ago, and it is still talked about.

Here is what you need: one bag of marshmallows per team, one box of spaghetti per team, and willing participants.  You can make the teams as large or as small as you want.  I had eight girls at the meeting, which made things easy for me, as I split the girls up into groups of four.  I gave them 20 minutes to work together to build a tower as tall as they could without having it fall over.  I also had to tell them not to eat their materials!  It only took them a matter of minutes to figure out that they could use the marshmallows as the “building cement”. 

I take that back….it took a matter of seconds for one scout to say: “Wouldn’t it be best if we drew up some blueprints before we start building this?”.


They worked quietly and quickly together on their buildings.  Some girls took on the role of the supervisors (like my Monkey) and others were happy to be the worker bees.


In the end, one team did a little better job than the other, as the one tower fell apart at the last minute.  But it didn't matter.  All that mattered was that they worked together, and had fun while doing it.

The last man standing
I think I will revisit this idea towards the end of the year, and provide both large and small marshmallows, and perhaps only provide a certain number of pasta strands.  They have the experience under their belt already, so I'm sure they could handle the task.

Until next time......


Thursday, February 14, 2013

Happy Valentine's Day!


Me: What kind of valentine cards do you want to give out to your class this year?
Monkey:  I don’t want to give out any.
Me: What?  You have to.
Monkey:  All the cards have love on them.  I don’t want to give them out to the boys.
Me: How about we get girl and boy valentines?  Look, here are baseball theme ones.
Monkey: (Looks at the back of the box).  Nope
Me: Why?
Monkey: (Reading the box)  Valentines, let’s take a walk in the ballpark together.  See!  It’s like I am asking him out on a date.
End scene.

I thought we could get one more year out of boxed Valentine cards, but I quickly found out that I was wrong.  I didn’t want the holiday to go by without it recognizing, so I started to brainstorm for ideas.  Where did I turn?  Why, Pinterest of course!  I found this Star Wars idea, but the Monkey was not having it.  I went back to the drawing board, and found this cute idea – Pixie Stix magic wands.  Winner!

This is a super easy idea, and can be adapted for any holiday (more on that later).  I bought a box of Pixie Stix at Sam’s Club (50 sticks for $12).  The ribbon was left over from Christmas.  I wanted to use hearts as the topper, but the Monkey said no way.  We found these cute Princess crown and Prince shields at the Dollar Tree (pack of 10 for $1).


Putting them together is a piece of cake, and can be done in four steps. 
  1. Step One:  Tape the topper to the label on the candy tube (this will cover it up). 
  2. Step Two:  Cut the ribbon into 12” lengths, and tie on the tube. 
  3. Step Three: Use your scissors to curl the ribbon to make things extra pretty. 
  4. Step Four: Admire your handiwork.


The Monkey loved the end result, and was super excited to give them out to her classmates.  I am sure that the class is going to LOVE them, and I am confident that their parents are going to HATE me.  Today is her classroom party, and I made cupcakes.  Totally not going to lie – these are from a box, and the frosting came from a can.  


Like I said, you can adapt these to any holiday.  Here are some ideas that you can build on:
St. Patrick’s Day à Shamrocks and green ribbon
Easter à Bunnies/Eggs and pink ribbon
Birthday à Balloons and any color ribbon

However you celebrate, have a Happy Valentine's Day.

Until next time....
   

Tuesday, February 12, 2013

Stupid Cupid, Stop Picking On Me

I find myself researching Pinterest all the time to come up with ideas to use at our Girl Scout meetings, and I am never let down.  Three of the activities we did last night were the brain child of Pinterest.  Scouts doesn't always have to be about earning badges, and reading stories.  It should be about having fun, and I think that's what the girls had last night.

Minute To Win It with Conversation Hearts

I have NEVER watched Minute To Win It, but I assume the contestants have one minute to do something.  Duh.  That's what the girls had last night.  They had one minute to stack as many conversation hearts that they could.  It sounds easy, but you have to know that candy hearts aren't smooth, and sometimes they are broken or stuck together.  For one minute, the room was quiet.  The girls worked hard to build their towers, but gravity was not their friend.

The Monkey stacking her hearts


We did another game using the candy hearts.  This time, the girls had one minute to transfer the hearts from one plate to the other by only using a pair of chop sticks.  Several of them said they had used chop sticks before, so they thought that would work to their advantage.  However, I quickly found that they didn't know how to properly use the sticks!  The rules stated they could only use the sticks, and they could not drag the candy from plate to plate.  Again, the room fell silent for one minute as each girl concentrated on their task.  Some girls struggled, and some girls had great success.  In the end, one scout transferred 27 hearts to her plate, and she was rewarded with a bag of Cotton Candy (much to her mother's happiness).


The Love Train

The last activity we did was The Love Train, which involves one of the most important thing about scouting -- teamwork.  The girls lined up (in alphabetical order, so we could avoid a lot of this: "I want to be first"), and I placed a balloon between each girl.  They had to walk across the room together without dropping the balloons.  If one fell, they had to start all over again.  They started off taking small steps, but gradually worked their way to walking "normally" across the room.  Once they figured out how to work together, they found it to be easy.  I was happy that they learned this out on their own without help from the adults!
Choo!  Choo!

We finished the evening with a small craft, and then the girls decorated sugar cookies for their snack.  They were then sent home with bellies full of sugar.

Until next time.....

Tuesday, January 29, 2013

To Infinity and Beyond


The end of any Girl Scout meeting must include snacks.  There is an unwritten rule stating such.  I wanted the girls to be able to make something, but I didn’t want to deal with the hassle of cleaning things up.  I couldn’t think of anything off the top of my head, so I went to my new best friend à Pinterest.  I came across a pin, which led me to this site.  I have since found that a lot of Girl Scout leaders had also pinned it.  It’s a pretty popular one.

When I explained to the girls what we were going to do, I heard a lot of this: “Eww!!” and “That’s gross!”.  They were provided with their directions, and silence filled the room.  It took them just about five minutes to make the snack, and even less time to eat it.  After they were finished, I heard a lot of this: “I liked it.  Can I have more?”.  Bonus fact -- without knowing it, the girls had worked on one of the requirements necessary to earn the Brownie Snack badge.

My Monkey, the astronaut


Astronaut Pudding

Materials Needed:
  • Box instant pudding
  • Whole milk
  • Ziploc bags
  • Scissors
  • Measuring spoon and cup


Scoop 1 tablespoon of the pudding mix into the bag.  Pour ¼ cup of milk in the bag.  BE SURE THE BAG IS SEALED!  Gently knead the mix until the pudding forms.  Snip off one of the corners, and squeeze out the pudding from the bag.  No utensils are needed – just like how the astronauts eat.

Sunday, January 27, 2013

Silent Sunday

Phillie Phanatic in buttercream form
I'm so ready for Spring Training to begin
Another idea from Pinterest