Showing posts with label candy. Show all posts

Monday, March 17, 2014

Top Of the Mornin' To Ya!


Happy St. Patrick's Day!

The Monkey set her trap last night to catch the leprechaun, but he's a sneaky fellow.  He ate all the gold chocolate coins, and left the wrappers on the floor.  He was nice enough to leave her a new pair of socks (fun stuff, right), nail stickers, and candy.  I don't think she will ever catch him.

I try to send in a little something for her class every holiday, and I didn't want St. Patrick's Day to be ignored.  These treats were simple to put together -- we probably spent an hour working on them. 

Her classmates are going to get some Leprechaun Kisses.  We were going to do something with "Kiss Me, I'm Irish", but she's at the age where she doesn't want the boys to get the wrong idea.  I found this free poem here.  You could print it out on card stock so it's sturdy, but I used plain old white paper.


We filled green sandwich baggies (found them at Target) with Hersey Kisses.  I cut the tops of the
bag (removing the zipper part), and used green ribbon to tie the bags closed.  To finish the treat, I stapled the poem to the top of the bag.  BAM! 

.
 
 
We did something similar for the 4th grade teachers, and her band instructor.  Instead of Hershey Kisses, we put Peppermint Patties in gold sandwich baggies (gotta love the Target!).  I found the cute tag here, and stapled it to the bag. 
 

This is what she put together for her teacher.  The Monkey did this one all herself.  It's a Pot of Gold.  She painted a flower pot black, made a rainbow out of pipe cleaners, and filled it up with Rolo candy.  You could use the chocolate gold coins to fill up the pot if you wanted to.


I hope that you and your family have a great St. Patrick's Day.  I want to leave you with this one thought:
 

You son is your son today, but your daughter is your daughter forever.

A man is only a son until he takes a wife. But as a daughter gets older, she will stay near the family, draining it of money and time for years to come. In Irish Gaelic, it's Is é do mhac do mhac inniú, ach is í d’iníon d’iníon go deo.


Friday, July 26, 2013

Jello Molds -- For the Young and the Old

When I say the words Jello Mold, what comes to mind?  For me, I think of old ladies that lunch.  Isn't that something they would bring to a lunch?  Jello in the shape of something, with fruit in it?  I also think of Aunt Bethany from Christmas Vacation.  She was kind of enough to bring a special jello mold to dinner.


Every so often, you can find special Jello molds in the grocery stores, especially when a kids movie comes to the theaters.  I wasn't looking for this Monsters University mold, but when I saw it, I picked it up. I attempted to make Jello Jigglers, but those were an epic fail.  EPIC. FAIL.


I started to think of what else I could use this mold for.  Clay?  Really?  What the heck would I do with a clay monster.  Melted crayons?  Aren't they all the rage right now?  I see a lot of crayon ideas on Pinterest.

How about candy?  This mold is really no different than the chocolate candy molds you can purchase from the arts-and-crafts store.  In fact, this one is way cooler because its Monsters University.  You can make your own chocolate monster.

The gangs all here
Meet Squishy

This is Art, who is voiced by Charlie Day (who happens to be my favorite from It's Always Sunny in Philadelphia)

Mike

Sully

It's not rocket science to make these.  You need to get chocolate wafers, which you can find at the arts-and-crafts store, or even your grocery store.  Following the melting directions on the packaging, pour the chocolate in the mold, and allow the candy to set.  The entire process takes less than a 1/2 hour.  I only had milk chocolate on hand, so mine look a little boring.  You could really jazz things up by using the colored chocolate -- make a blue Sully and a green Mike.  The sky is the limit.


And if you haven't seen Monsters University yet, I just have to ask....What are you waiting for?


Until next time.....

Monday, June 3, 2013

Wrapping It Up!

If you find yourself buying “fancy” bags to wrap up your homemade goodies, I have something to tell you.  You are wasting your money.  Seriously…think about it.  Chances are, you are making something for your son or daughter’s class party or bake sale.  You spent some time making this masterpiece, so yeah, you want it to look nice.  But the packaging if often overlooked by little Tommy, who just wants to get to the treat.  He tears it apart, and the fancy packaging is now in the trash can.  That’s money well spent, right?

I made chocolate covered peeps for a recent bake sale at the Monkey’s school, and spent a total of $1 to package them up.  That’s right -- $1.  All you need is a box of sandwich baggies from the dollar store (plus some ribbon, which I had on hand, and you most likely do as well!).

Gather your supplies -- ribbon, sandwich bags, scissors, and your treat.


Cut the zipper seal off of the baggie.


Slip your treat inside the bag, and tie it shut using your ribbon.


The kids didn't care how it was packaged -- they just wanted the chocolate covered marshmallows inside.

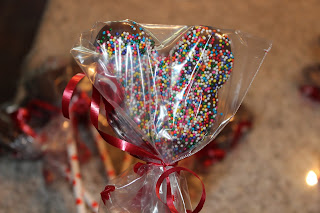
These are cute, right?  I found Mickey Mouse shaped Peeps at Christmas.  I'm not sure why these were made specially for that holiday, because Mickey can be used all year round.  Believe it not, these were super soft five months after I bought them!  And, to gross you out even more, the package wasn't set to expire until October 2014.  Peeps are the new Twinkies...they will last a lifetime.  I wrote about making chocolate covered Peeps earlier this year if you want to try this on your own.


Until next time.....

Wednesday, March 27, 2013

Birthday Candy Bouquet

It's birthday party season.  If you are a parent of an elementary school aged child, you know what I am talking about.  For those that don't, allow me to explain.  The Monkey is in a class that has just over 20 students in it, and she averages a party invite about every two weeks.  More often than not she ends up missing them, due to previous commitments.

But not today!  Today she went to a laser tag party (she's there as we speak) that included a chocolate chip cookie cake.  I'm not sure what she was more excited about -- the cake or the party itself.

I wanted to do something a little bit special for this friend, because she is a "good kid".  You know, she's the kid you want your child to stay friends with for as long as possible.  She's friendly, polite, kind, considerate....just a good egg.  I saw posts all over Pinterest for a candy bouquet, so I decided to make one for her.  Here's how you can do it.

Supplies
(I purchased all of these at the Dollar Tree, so this is not something that will break the bank)
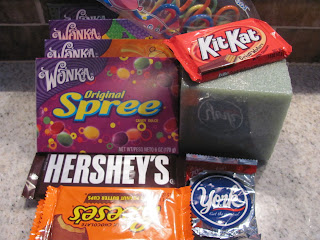
4 boxes of movie theater candy, roughly all the same size
One block styrofoam
Package of crazy straws
6 regular size candy bars
Packing tape, glue, and a piece of cardboard


Line the boxes of candy up so that they form a square (sorry, for some reason I neglected to take a picture of this step).  Use the packing tape to tape the boxes together FROM THE INSIDE.  This way, the recipient will not see the tape.

Cut a piece of cardboard to fit the bottom of your "box".  I used an empty cereal box.  Line the candy boxes with glue, and attach the board.  You will need to allow the glue to set, so walk away and do something. 


Once the glue is set, turn your masterpiece upside down so the board is now on your workspace.  Place the styrofoam inside your candy vase.  You most likely will need to cut it to fit the space. 


Attach the candy bars to the crazy straws with a piece of packing tape.  If you don't have the straws, you can use a wood dowel or a ka-bob stick.  I thought the straws were a fun addition to the craft, and it was something that could be used again.


Once you have the candy bars taped to the straws, you can place the straws in to the styrofoam.  You want to place them as far down into the foam as you can, so they can be stable.  You don't want things to fall apart when you are giving the gift.


The styrofoam looks pretty ugly, so you want to fill up all of the empty spaces.  You can use more candy if you, like Hershey Kisses.  Or you can fill it up with strips of crinkled paper, or even Easter grass.  I had some tulle left over from when I made my niece a tutu, so that is what I used. 


Voila!  You are done.  You have now created your own candy bouquet.  My aunt told me that she found a store selling candy bouquets for $30, which is CRAAAZY to me. This cost me $11 to make, and I'm sure it could even be made for less money if I shopped around.

The birthday girl loved her gift.  The first words out of her mouth were....well, they were "Thank You".  Remember, I just gushed about how polite she is.  The second words out of her mouth were "AWESOME!".


Until next time.....

Tuesday, March 19, 2013

Irish Potatoes

Well, I was planning on having today’s post be simply about Irish Potatoes.   I always assumed that people knew what I was talking about when I mentioned them, but I was wrong.  I often found people staring back at me with a blank look on their face.  Apparently, these are a regional thing, and most people outside of the Philadelphia area aren’t familiar with them.

Irish Potatoes are a mixture of cream cheese, butter, powdered sugar, and coconut.  Once combined, the mixture is rolled into cinnamon.  The final result looks like a small potato.  These are delicious, and if I let myself, I will eat the entire batch.  This is an easy recipe to make, and it’s perfect for little hands.

Ingredients:
  • 1 block cream cheese, softened
  • 3 cups confectionars sugar
  • 1 tbsp vanilla extract
  • ¼ butter, softened
  • 2 cups shredded coconut
  • Cinnamon          
Instructions:
  • In large bowl, cream the butter and cream cheese together.
  • Add vanilla and the sugar.  Beat until the mixture forms a ball.
  • Stir in the coconut.
  • Using your hands, roll the mixture into small balls (or form them to look like small potatoes).
  • Place the cinnamon in a shallow dish, and roll the balls in it.
  • Place the balls on a cookie sheet, and chill for about an hour.
The final result!
Yesterday I posted about my first friend, and cousin, Kevin.  I specifically stated that I consider all my cousins my friends, and that I didn’t want any texts from them with complaints.  So, what happened?  I got this.


This is my cousin, and my friend, Timothy.  Everyone used to call him Timmy, but he put a stop to that – or at least he tried.  I stopped calling him that when he bought me a beer at a U2 concert, and he was underage.  Like, really underage.  It was during the Elevation tour, so you do the math.
Penn State / Temple Game 2007

He is Kevin’s younger brother, and again, he’s one of the funniest people I know.  He shares my nerdy interests, and is the only person outside of Mary Kaye that shares my obsession with Bruce Springsteen.   We dragged out spouses, and our children, to the Springsteen exhibit this past summer at the National Constitution Center in Philadelphia.  We could have easily spent the afternoon looking at Bruce’s old liner notes, concert posters, and tattered jeans – it was Bruce heaven.  However, we both decided staying married was a bit more important, as his wife and my husband looked bored out of their minds.
Kevin and Michele's Wedding (2007)

Tom and Mandy's Wedding (2008)

Boba Fett?  Boba Fett?  Where?

The Monkey started calling him Uncle Tim, after she would hear her cousins continually say it.  He never blinked an eye when we heard it, and he made sure that everyone knew it.  He treats her as if she is truly her niece.  Family like that is rare.
Megan, Uncle Tim, and a member of the Imperial Army
Happy now bonehead?

Jeez….who is going to text me next?

Until next time….

Thursday, February 14, 2013

Happy Valentine's Day!


Me: What kind of valentine cards do you want to give out to your class this year?
Monkey:  I don’t want to give out any.
Me: What?  You have to.
Monkey:  All the cards have love on them.  I don’t want to give them out to the boys.
Me: How about we get girl and boy valentines?  Look, here are baseball theme ones.
Monkey: (Looks at the back of the box).  Nope
Me: Why?
Monkey: (Reading the box)  Valentines, let’s take a walk in the ballpark together.  See!  It’s like I am asking him out on a date.
End scene.

I thought we could get one more year out of boxed Valentine cards, but I quickly found out that I was wrong.  I didn’t want the holiday to go by without it recognizing, so I started to brainstorm for ideas.  Where did I turn?  Why, Pinterest of course!  I found this Star Wars idea, but the Monkey was not having it.  I went back to the drawing board, and found this cute idea – Pixie Stix magic wands.  Winner!

This is a super easy idea, and can be adapted for any holiday (more on that later).  I bought a box of Pixie Stix at Sam’s Club (50 sticks for $12).  The ribbon was left over from Christmas.  I wanted to use hearts as the topper, but the Monkey said no way.  We found these cute Princess crown and Prince shields at the Dollar Tree (pack of 10 for $1).


Putting them together is a piece of cake, and can be done in four steps. 
  1. Step One:  Tape the topper to the label on the candy tube (this will cover it up). 
  2. Step Two:  Cut the ribbon into 12” lengths, and tie on the tube. 
  3. Step Three: Use your scissors to curl the ribbon to make things extra pretty. 
  4. Step Four: Admire your handiwork.


The Monkey loved the end result, and was super excited to give them out to her classmates.  I am sure that the class is going to LOVE them, and I am confident that their parents are going to HATE me.  Today is her classroom party, and I made cupcakes.  Totally not going to lie – these are from a box, and the frosting came from a can.  


Like I said, you can adapt these to any holiday.  Here are some ideas that you can build on:
St. Patrick’s Day à Shamrocks and green ribbon
Easter à Bunnies/Eggs and pink ribbon
Birthday à Balloons and any color ribbon

However you celebrate, have a Happy Valentine's Day.

Until next time....
   

Friday, October 26, 2012

Candy Free Halloween

Today is the Monkey's Halloween parade and party at school, and like most of the schools across the county, they are trying to cut down on the sugary treats.  I am a classroom volunteer, which means I am a sucker parent that tries to help out whenever I can.  In this case, it meant that I sent in a treat for the party.  We were to send in apples, grapes, and popcorn.  Woo Hoo!  Let the fun begin.  Fortunately, one family is bringing in cupcakes and cookies.  Can you imagine the mutinty that would have happened this afternoon?

Monkey wanted to give her classmates a Halloween treat, and insisted that she give out candy.  Considering the healthy party snacks, I was hesitant to let her.  Normally I don't care what people think about me, but I didn't want to be labeled "That Parent" for the rest of the year.  We racked our brains to come up with something, but we came up empty handed.  So, off to Pinterest we went (thank God for Pinterest) and we came across the great idea.  Thanks to Love Stiched for the inspiration.


This is super easy, and inexpensive.  I found vampire teeth (12 for $1) at the store, and simply printed out Have a "Fang-Tastic" Halloween! on paper.  We cut out each strip, wrapped them around a set a teeth, and taped the ends together.   Here is the finished product.  Sorry -- it hard to really see what they look like.  Monkey wanted to glow-on-the-dark teeth, and they do not photograph very well.


And here is Monkey, all ready for Halloween fun at school today!

Have a great Halloween -- and be sure to enjoy all of your sugary treats!